
Making sourdough at home can seem intimidating. It requires special equipment, it takes time to make the dough, and the skills needed to shape and score loaves have to be learned. So, is it worth it? YES. I do think so. There is nothing so lovely as your own beautiful sourdough loaves. The accomplishment of it, the taste of them, the fact that they last nearly a week stored correctly. It’s all very Back to Basics. The point of this post is to simplify the learning process for other home bakers.
For this post, I’ll be using an adapted formula and time table of Tartine’s country loaf. The temperature for both the dough and the starter needs to be 70-80 degrees Fahrenheit. Fermentation will be quicker if it is on the warmer side. Most sourdough bread formulas are pretty simple. It’s just flour (100%), water (usually anywhere from 62-75% as much in weight compared to the flour), starter (20%) and salt (around 2%). You can make your own formulas once you get the hang of things. Experiment with different flours (though I recommend keeping at least a portion of bread flour), use different amounts of water, add nuts, seeds, or dried fruits to the dough, roll the shaped boules in seeds or nuts after final shaping. It’s really endless.
There are four components to being able to make a loaf of bread that, I swear, will be better than what you can get at most bakeries.

- Starter
- Equipment
- Time (and planning)
- Technique
Ingredients for entire project: Rye flour, whole wheat flour (a 2 lb bag is enough), bread flour, kosher salt.
Starter
Honestly, there are a lot of different time/flour/water combinations that people employ to make starter. Rye makes the starter develop faster.
You need:
- A container: a jar, or a bowl with a lid, that you have weighed (lid off). Make a note of the weight of the container when it is empty.
- Bottled or filtered water
- Rye flour, Bread flour, honey.
Method:
- Day 1: AM: Mix 50 grams of rye flour, 50 grams bottled water, and 10 grams honey in pre-weighed container. Leave for 24 hours.
- Day 2: AM: Throw out all but 50 grams of mixture from yesterday (which we will now refer to as your STARTER). So, if your jar weighs 150 grams, throw out starter until the jar + the starter = 200 grams. Mix 50 grams starter with 50 grams bottled water and 50 grams of rye flour.
- Day 2 PM: Mix 50 grams starter with 50 grams bottled water and 50 grams rye flour. (we will now call this FEEDING YOUR STARTER)
- Day 3: AM: Feed your starter.
- Day 3: PM: Feed your starter.
- Days 5-8: Feed starter in the morning and the evening every day, but now use: 50 g starter, 50 g water, 25 g bread flour, 25 g rye flour.
- Days 8-9 Feed starter in the morning and the evening both days, but now use: 50 g starter, 50 g water, 50 g bread flour.
- Day 10: Your starter should now be rising and falling predictably. Feed starter every 12 hours with bread flour and water for as long as it is sitting on counter. Increase amount if planning to bake bread that day. If you need 200 g starter for a recipe, use 100 g starter, 100 g water and 100 g bread flour. The starter is ready to use a few hours after feeding, when it has plenty of bubbles. To test it, put a teaspoon of it in a glass of water, it will float when it’s ready.
- When not using your starter for a while, store it in the fridge. Feed it, wait until it has developed a bit (2-3 hours) and put it in the fridge. You can keep it there for 2 weeks, more if necessary because of travel. When you take it out, leave it out for 2 hours, drain off any liquid on top and feed, starting with a rye flour feed. Wait until you’ve gone through at least 2 feedings to use.
Mix-In Ideas: I’ve included a guide to the amount I might add, but really, you can eyeball what you think you might like.
Nuts (100 g or 10% of total flour) (Pecans, Walnuts, Hazelnuts), Seeds (75 g or 7.5% of total flour) (sesame, quinoa, chia, flax, sunflower, poppy), Dried Fruits (150 g or 15% of total flour) (raisins, cranberries, cherries, apricots, etc.)
Formula:
Total Flour 100% (Bread Flour 90%, any kind of Whole Wheat Flour 10%,) Water 72%, Starter 20%, Fine Sea Salt 2.2%
For two loaves: Total Flour 1000 (Bread Flour 900 g, Whole Wheat Flour 100 g,) Water 680 g, Starter 200 g, Fine Sea Salt 22 g + 40 g water more
For one loaf: Flour 500 g (450 bread flour, 50 whole wheat flour), 340 g water, 100 g starter, 11 g fine sea salt + 20 g water more
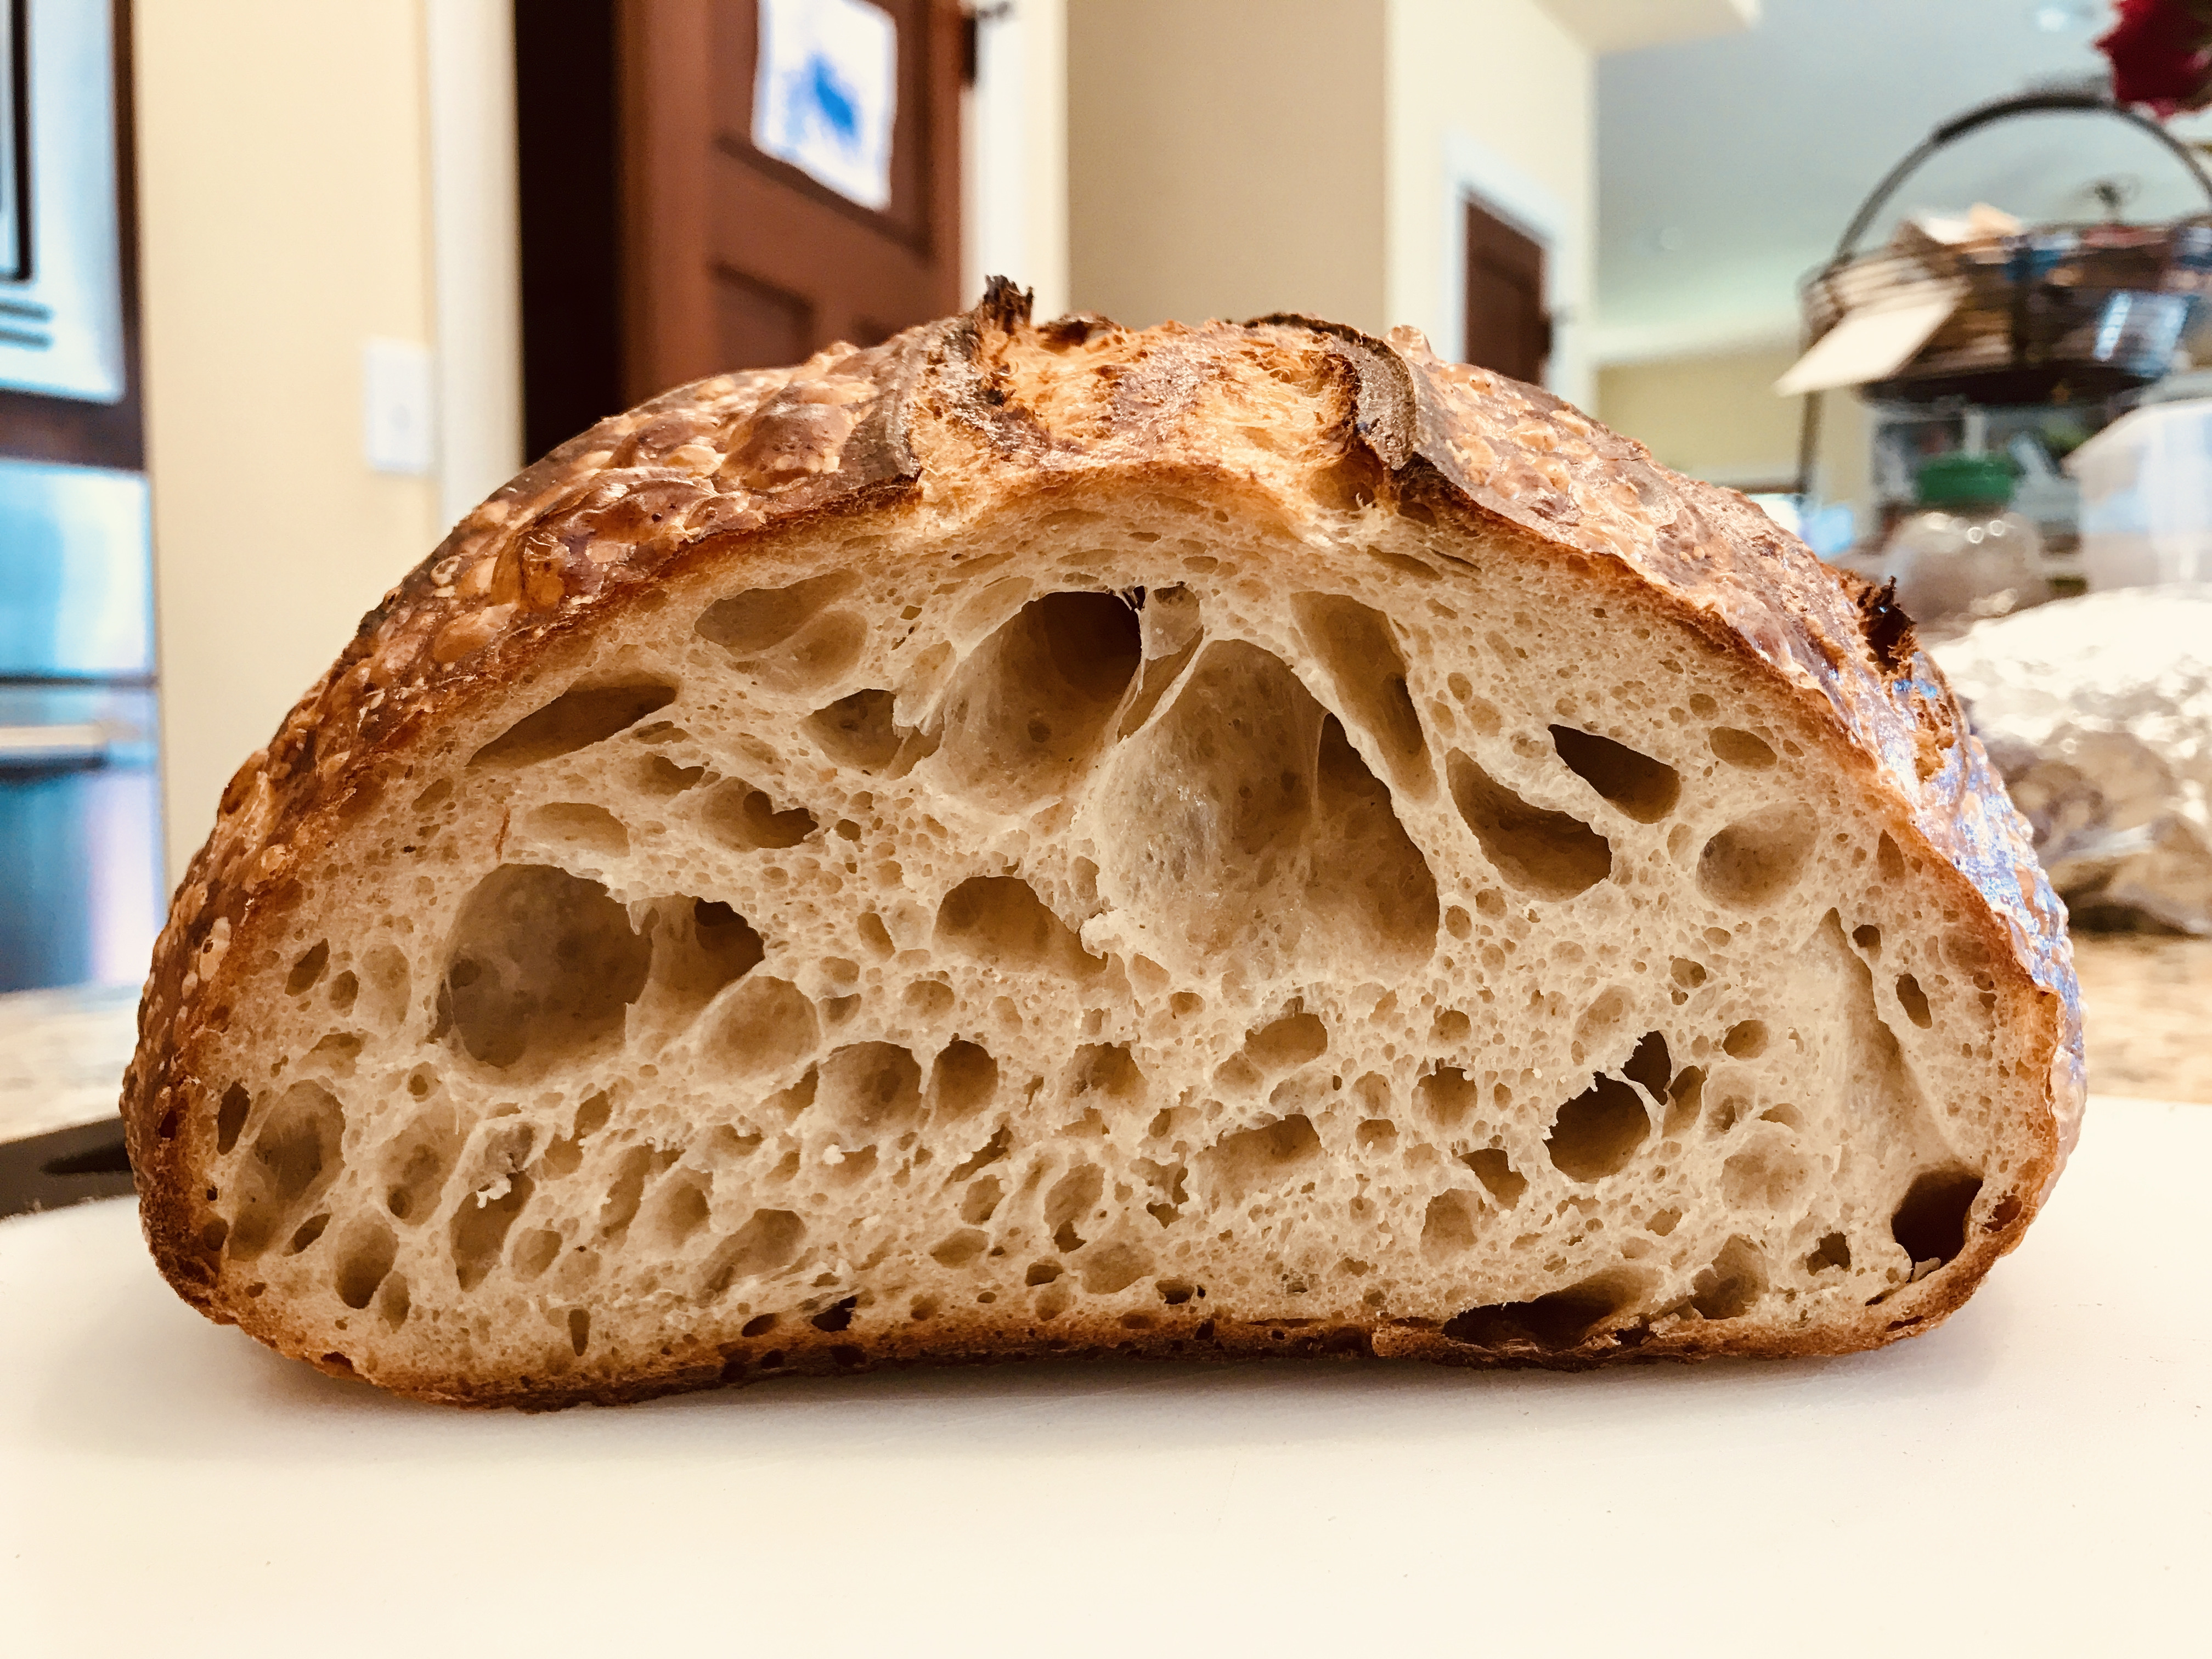
Start with warm water (not hot) in a large bowl, add starter and swirl with fingers or using a whisk until dissolved. Add flours and mix well. Scrape sides of bowl and cover with a couple of kitchen towels. Rest for 1 hour. Add salt and extra water and use a pinching motion to mix well. Move to an oiled bowl or container about 3 times the size of the dough. Wet hands well with water and gently pull dough up from the middle with your hands underneath. Tuck the ends under, turn 90 degrees and repeat. You should have a neat package at the end. This is called a coil fold (video demo below). Repeat every 30 minutes, a total of four times (2 hours). Be gentle. You are trying to keep all of the fluffiness and bubbles intact. Rest one more hour. When you think it looks done (has some bubbles, is 1.5x original size, fills in slowly when lightly prodded with a finger) pull a bit of the dough from the top out about an inch. It should be elastic, hold well, and not rip. If it doesn’t fulfill these criteria, let it continue to rise. If it does, time to divide and pre-shape (see video from SFBI). Don’t get too crazy with pre-shaping, you risk losing volume. Just shape the dough in to a loose ball. After pre-shaping, rest dough 30 minutes well covered, then do final shaping (see videos). Place in towel lined baskets or bowls and cover well with lightly floured towels. Leave in refrigerator overnight. The next morning, preheat oven to 500 F with dutch oven inside on top rack or as high up as it can comfortably fit. Let heat for 1 hour. Take one dough round out of fridge and turn out of basket onto bottom half of dutch oven or parchment paper. Score bread by cutting with either a razor or serrated bread knife. See more on scoring below in ‘tips and tricks.’ Cover with lid and place in oven. Lower temperature of oven to 450 F. Bake 21 minutes, then remove top half of dutch oven and bake 22 minutes more or until very dark brown. Cool for 1 hour and enjoy!
Resources:
My favorite sourdough bread book is Tartine Bread by Chad Robertson. I think of it as more of a guide than anything. So much of sourdough is by feel, and so much depends on the ingredients, the temperature, the oven, your own shaping and scoring skills. You need a guide and some tips, some demonstrations, and then you just learn by doing. To that end, here are some video demonstrations of a coil fold, pre-shaping and shaping techniques when you’re working with a wet dough like this one. I would advise anyone starting to dive in to sourdough to just be open to the journey, and to experiment and learn from what you’re doing. A lot of things in baking can be difficult to get the hang of, but sourdough has a particularly huge reward when you do.
My favorite online bread-specific resources for both inspiration and technical questions:
http://girlmeetsrye.blogspot.com/
http://www.thefreshloaf.com/handbook/scoring
http://www.wildyeastblog.com/get-your-malt-on/
Equipment:
Lodge Cast Iron Combo Cooker (you can just use any oven safe pot with a lid, but I like this because I don’t have to worry so much about touching the sides of a deep pot)
Bannetons (or 8 inch bowls, on the deep side)
6 quart Cambro and lid (not necessary, you can use a big bowl and a couple of kitchen towels to cover
I use kitchen towels to line my baskets. I also use kitchen towels to cover the boules during the bench rest (period between pre-shaping and final shaping).

Tips and Tricks:
- Use alarms on your phone to keep your schedule going. Create alarms for: Adding Salt, 1st turn, 2nd turn, 3rd turn, 4th turn, Divide and pre-shape, and Final shaping. This will take the mental energy out of the whole process, I find it much easier.
- Make 2 loaves, freeze 1. Freeze sourdough, once fully cooled, by wrapping it in tin foil, plastic wrap, or both. Defrost, still wrapped, on counter for at least 5 hours and up to 12, then unwrap and bring back to shattering crispness in a 350 degree oven, center rack, for 10-15 minutes. It will be perfectly fresh.
- Figure out your oven. My loaves were burning on the bottoms, so now I bake them on the highest rack where the pans will fit, and I also slide an empty sheet pan underneath them at the start of baking.
- It’s easiest to score sourdough when it’s cold, and it also tastes even better when it has had a long and slow final rise. Shape it and then keep in the fridge for the final proofing.
- If you feel that your loaves aren’t as crisp as you want, when they are as dark as you’d like, turn off the oven but leave them in there for an hour. This will probably be unnecessary if you are going to freeze and re-heat.
- Storing: you can wrap your loaf in a kitchen towel, in foil, or on a cutting board with a cake dome for a cover. Storing in plastic will make it soft.
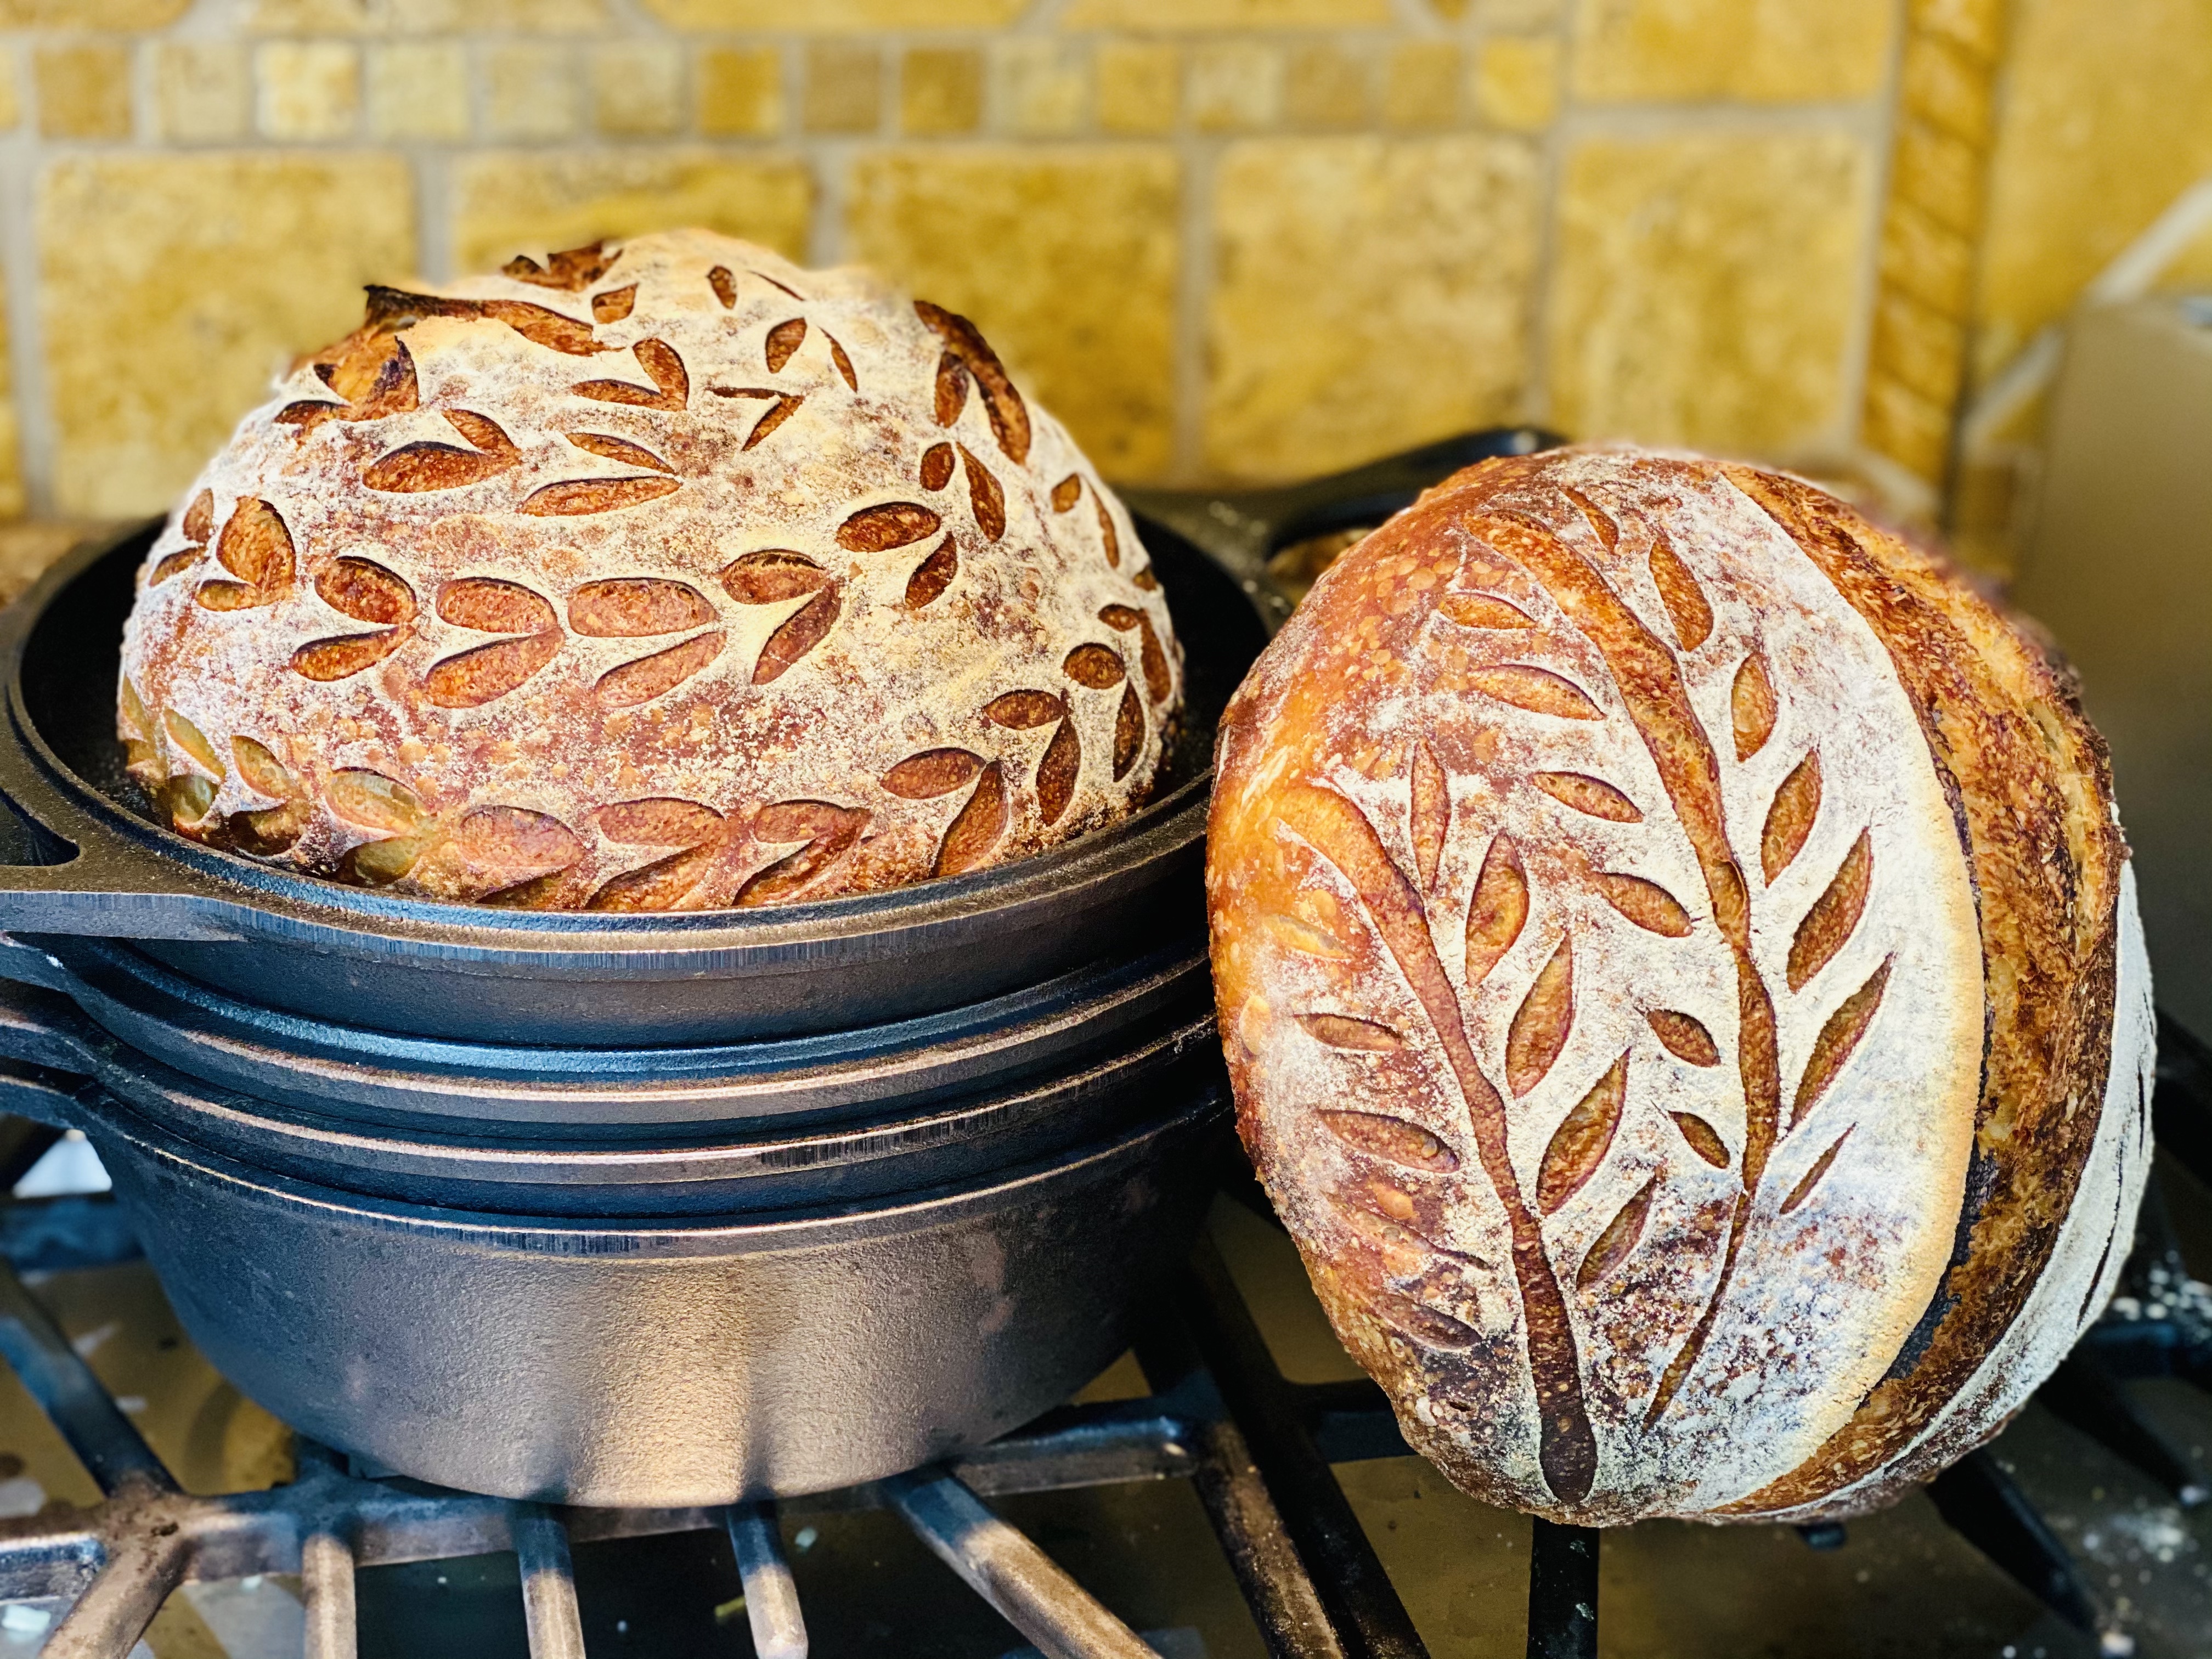
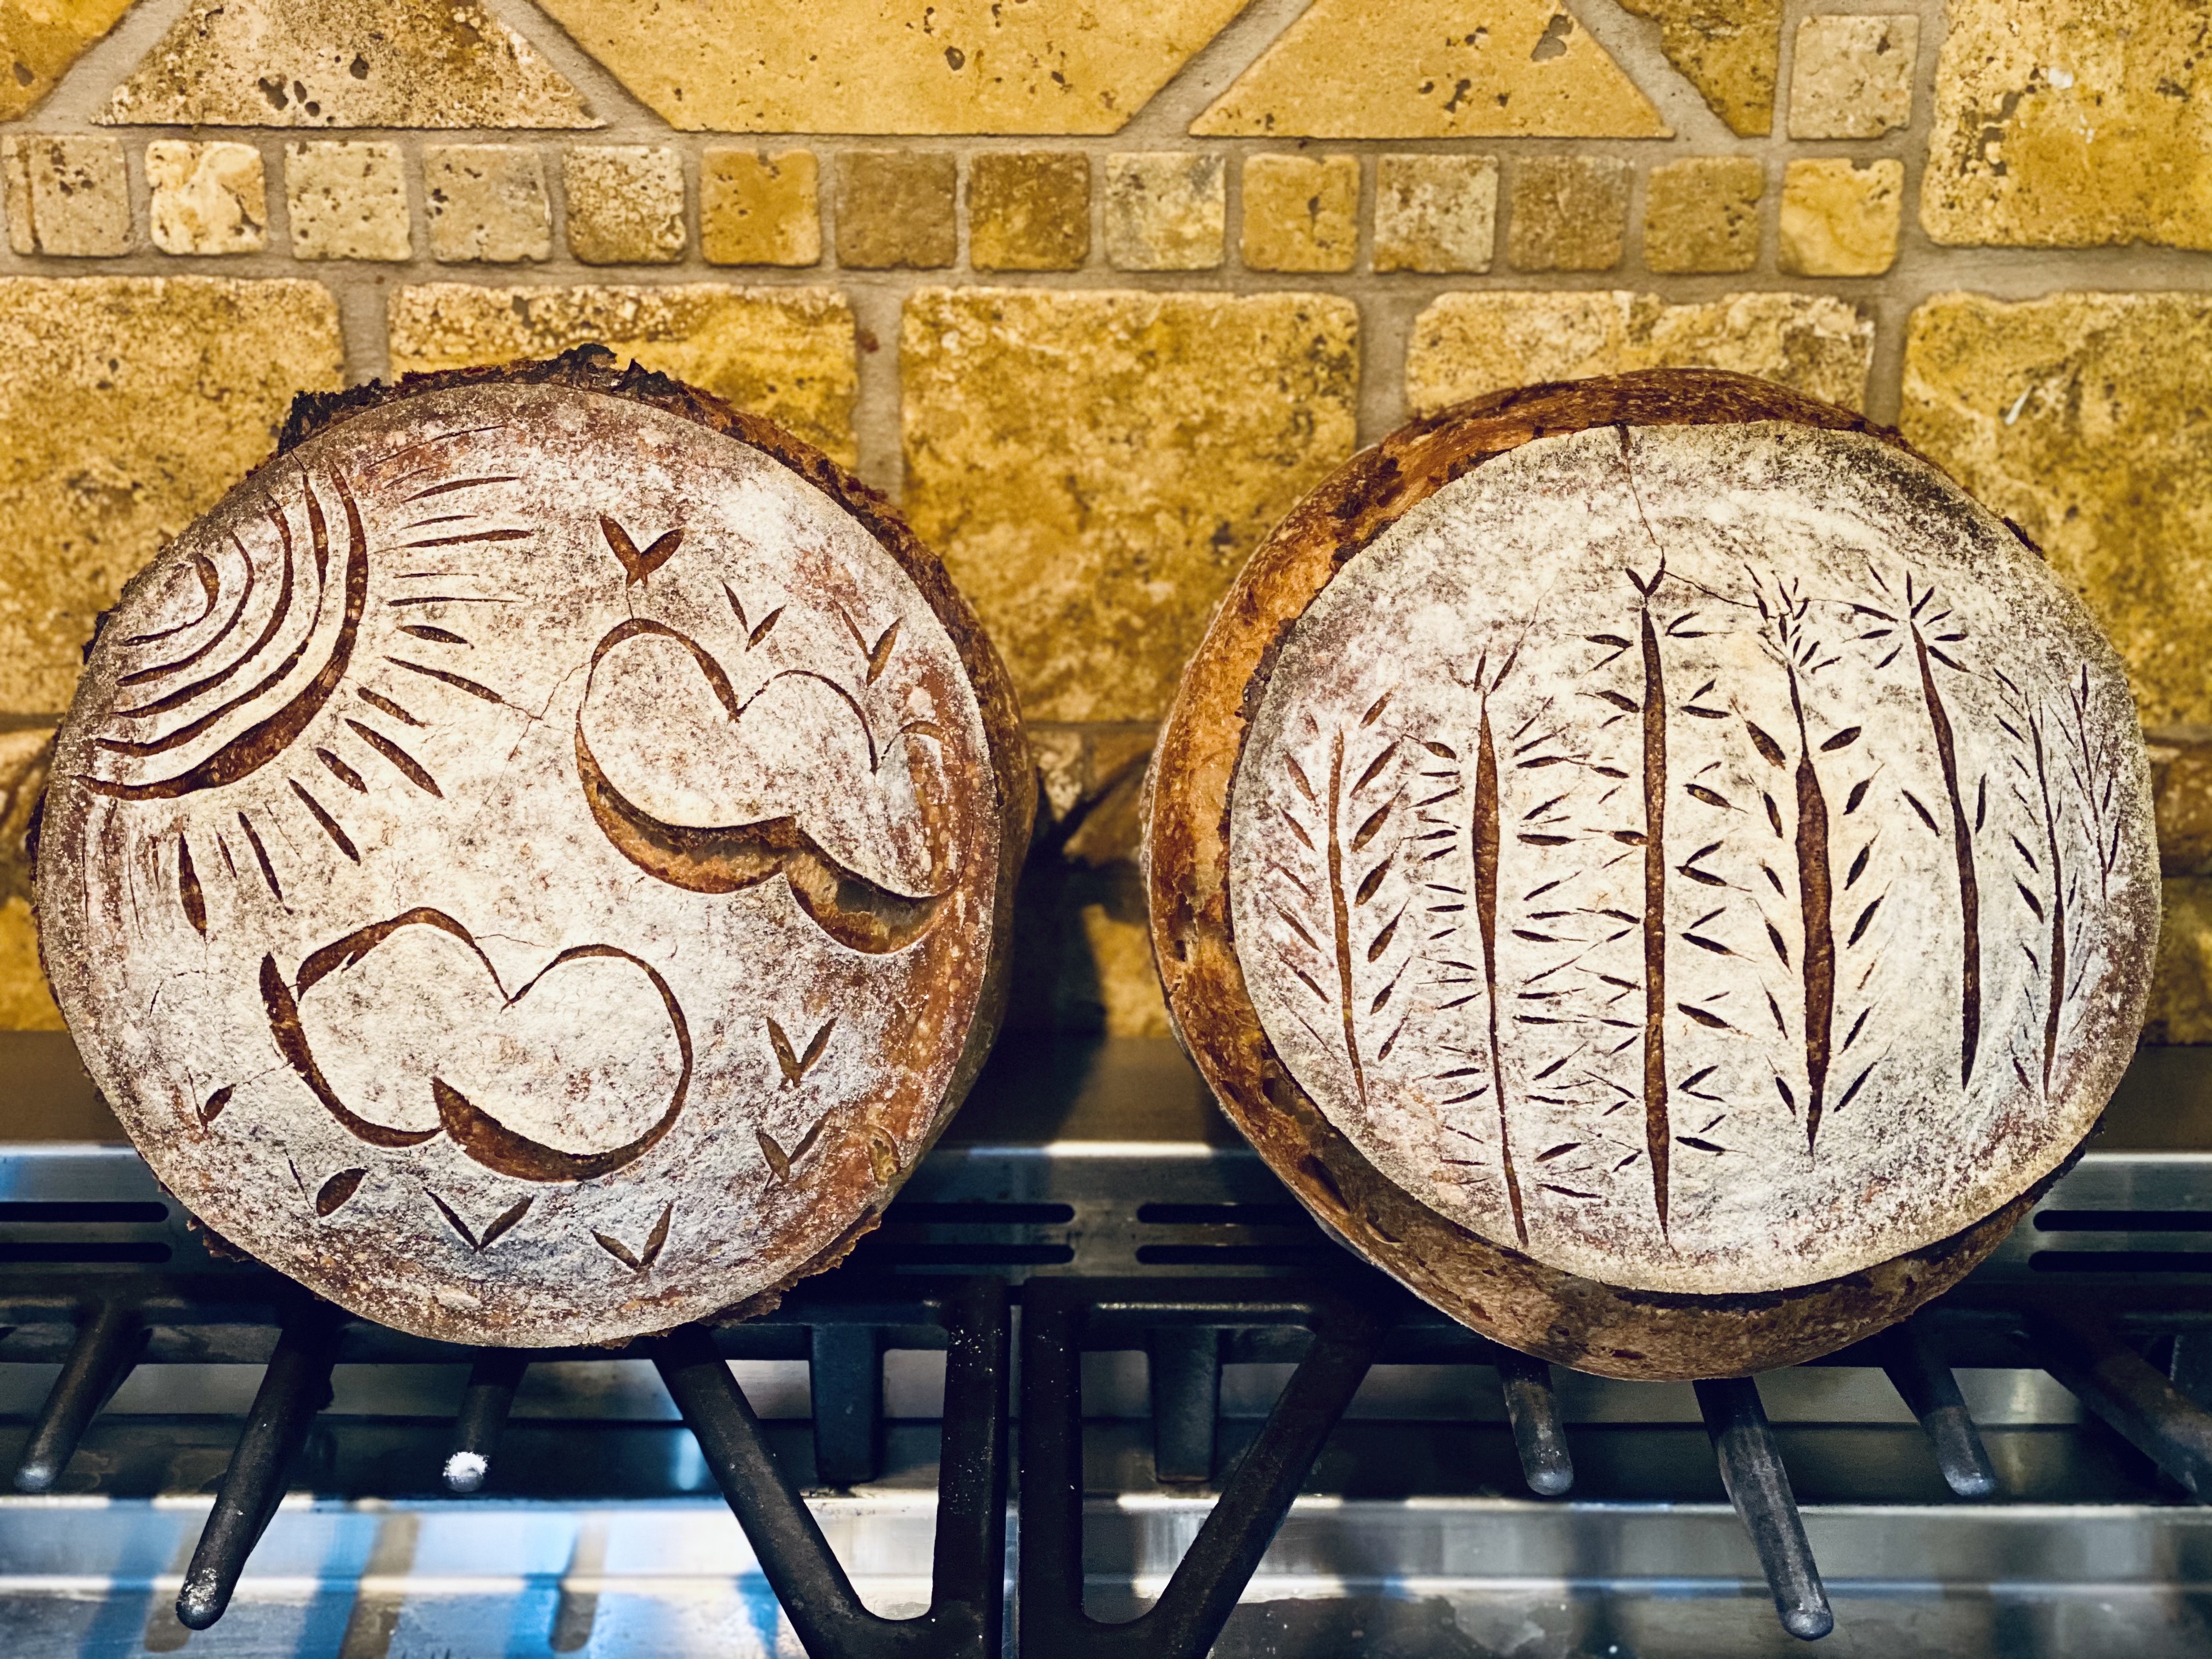
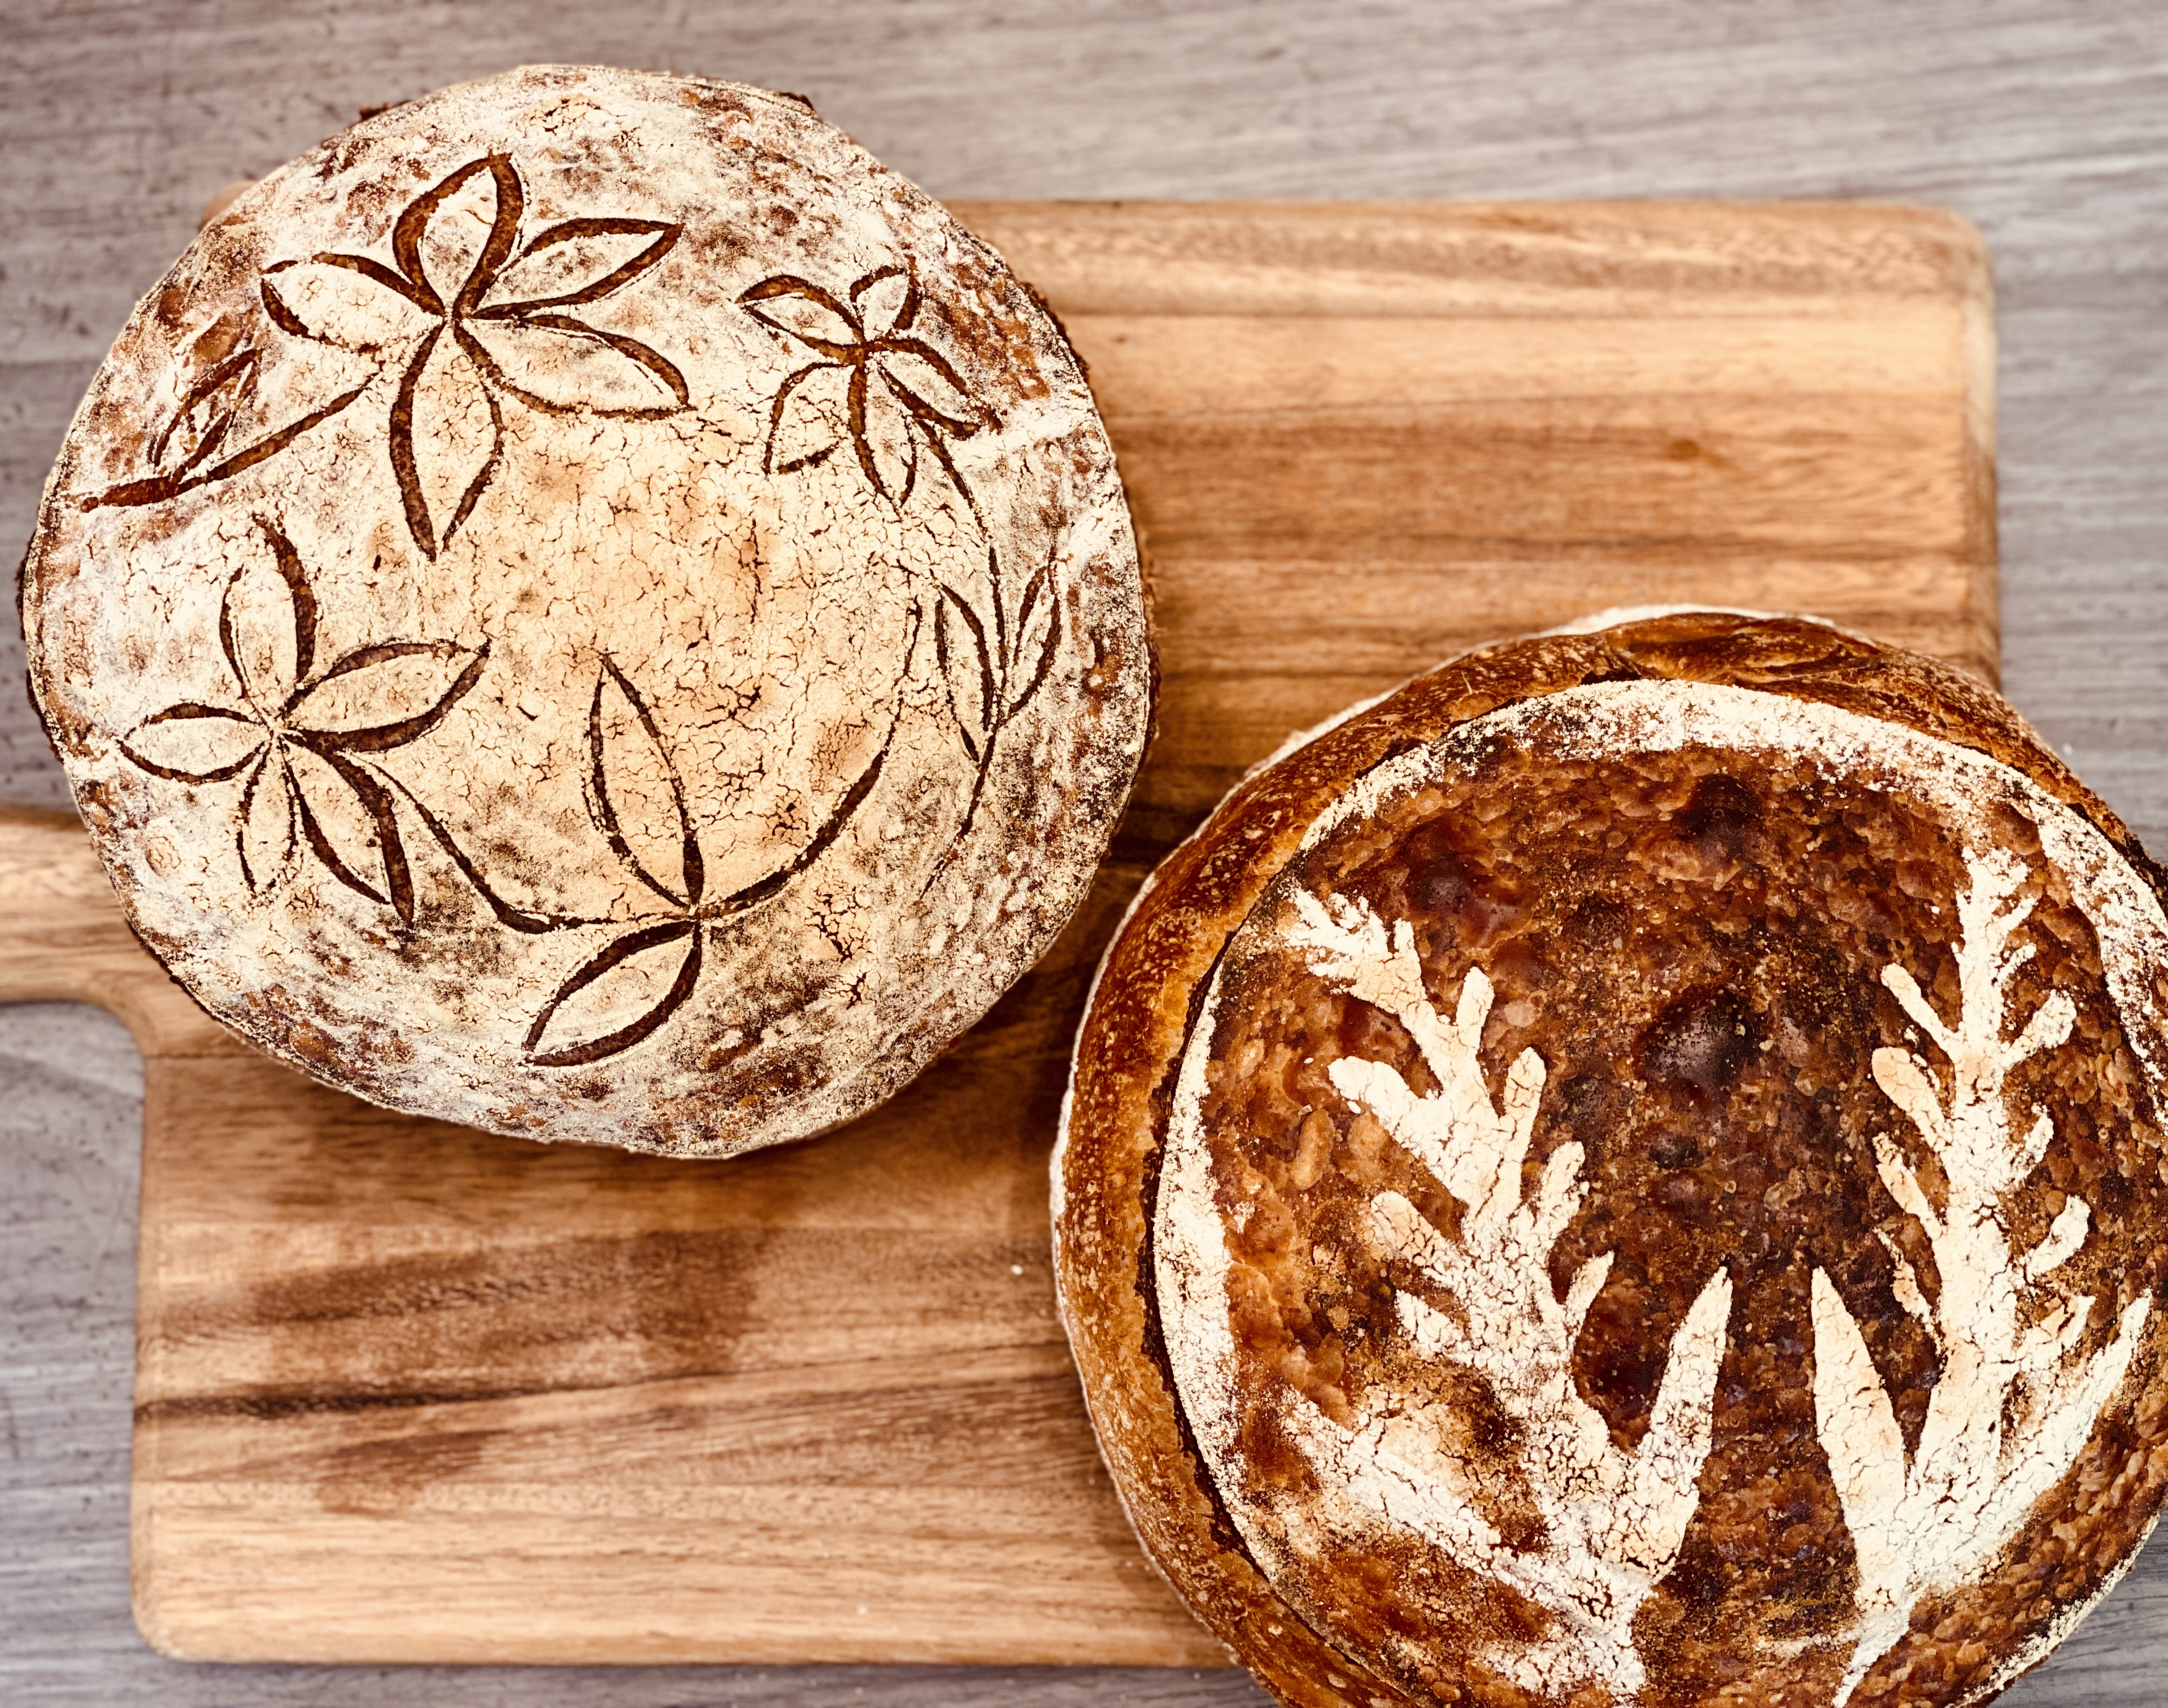
- Scoring: the purpose of scoring is to let steam escape the dough easily and in an orderly manner so that your loaf can rise as high as possible and be nice looking as well. Deep cuts are about 1/4″-1/2″ deep, and those will let steam out. To get ears, you want to hold the knife or blade almost flat, parallel to the table.
- Decorative cuts should be very light and shallow and you should hold the razor straight up, so that it is at a 90 degree angle to the table. Place the loaves, seam side down, on a half piece of parchment and then sprinkle with flour and use your hand to spread it evenly over the surface of the dough. Proceed with scoring, and use the parchment to help transfer to heated dutch oven. You can use kitchen twine to help make patterns, or even use it to loosely tie the loaf and influence the final shape, as in pumpkin shaped loaves. If you’re going to draw something, it may be easier to first trace it in the flour with a toothpick before going over it with a razor blade. If you do not make any strong, deep cuts where the steam can escape, you risk either holding the loaf back from reaching its’ potential or the loaf just opening up wherever it finds a weaker spot to let air out. A great way to make sure that a design stays intact is to place a deep cut somewhere, perhaps all the way around the bottom, or one side.
- Great Instagram accounts where you can watch scoring videos and get inspiration: Bread Journey, Mad.About.Bread, emmabakesbread, sourdough_enzo. You can also check out my Instagram here!